Getting Started with XWX Backup
XWX Backup is a local-first desktop app that turns your scattered AI conversations into a permanent, searchable Markdown archive. This guide gets you from download to your first completed backup in about five minutes.
Step 1: Install the Desktop App
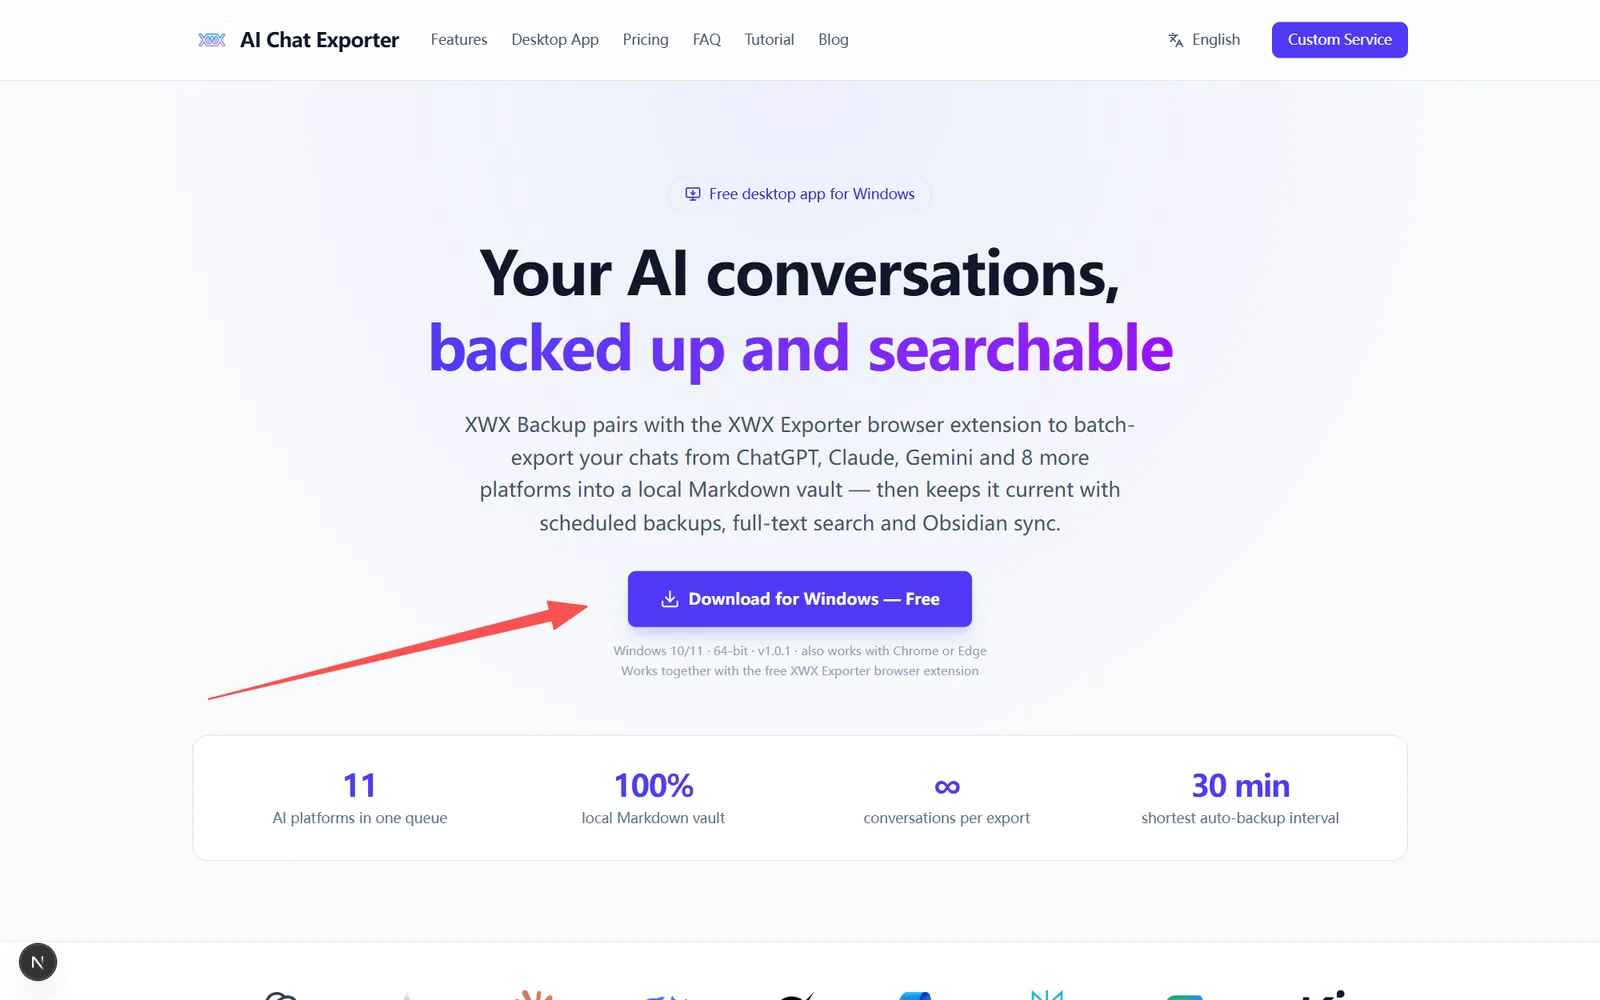
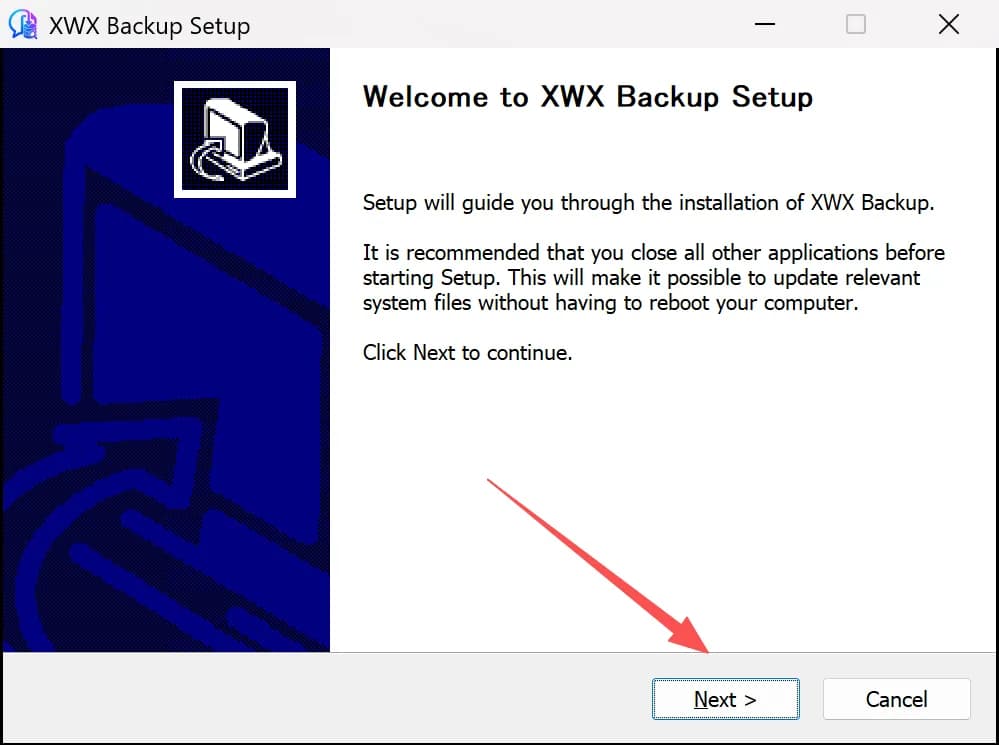
Download XWX Backup for Windows (10/11, 64-bit) from the download page and run the installer.
- Download
XWX Backup_setup.exe - Run the installer — Windows SmartScreen may show a warning because the app is newly published; click More info → Run anyway
- Launch XWX Backup from the Start menu
The installer includes an auto-updater. Updates are cryptographically signed and verified before installation; you’ll see an in-app banner whenever a new version ships.
Step 2: Sign In
On first launch, click Sign in with Google — your browser opens the Google account picker, you choose your account, and you land back in the app, signed in. One click, no passwords.
Prefer not to use Google? Choose or use email verification instead: enter your email address, click Send verification code, and type in the 6-digit code we email you.
An account is required to use the app: it links purchases (Pro licenses) and manages your device quota (up to 3 personal devices per account). Your conversation data itself never touches our servers — the vault lives entirely on your disk.
Step 3: Install & Connect the Browser Extension
XWX Backup reads conversations through the free XWX Exporter browser extension, which uses your normal logged-in browser session.
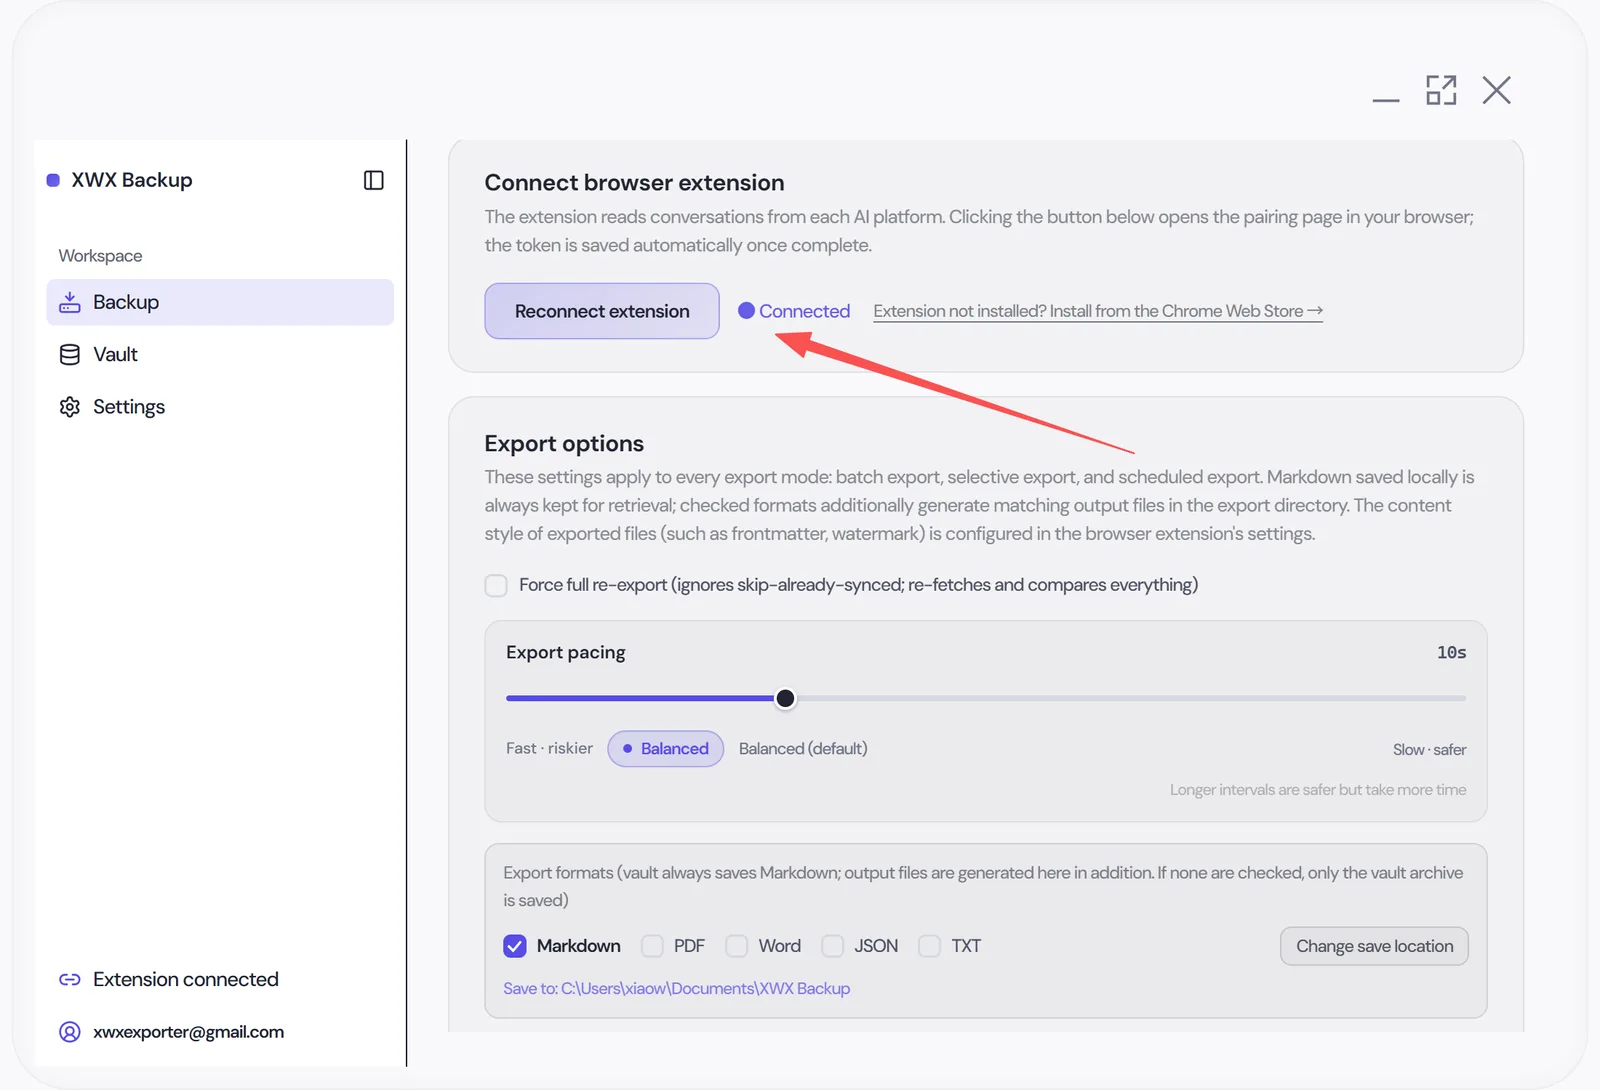
- Open the app’s Backup page and click Connect extension
- If the extension isn’t installed yet, follow the in-app guide to install it from the Chrome Web Store (works in Chrome, Edge, Brave and other Chromium browsers)
- Your browser opens the pairing page (
127.0.0.1:18241/connect) — approve it once - The Backup page shows Connected with a green status dot when pairing succeeds
The connection is local-only: app ⇄ extension traffic never leaves your machine.
Step 4: Run Your First Export
With the extension connected:
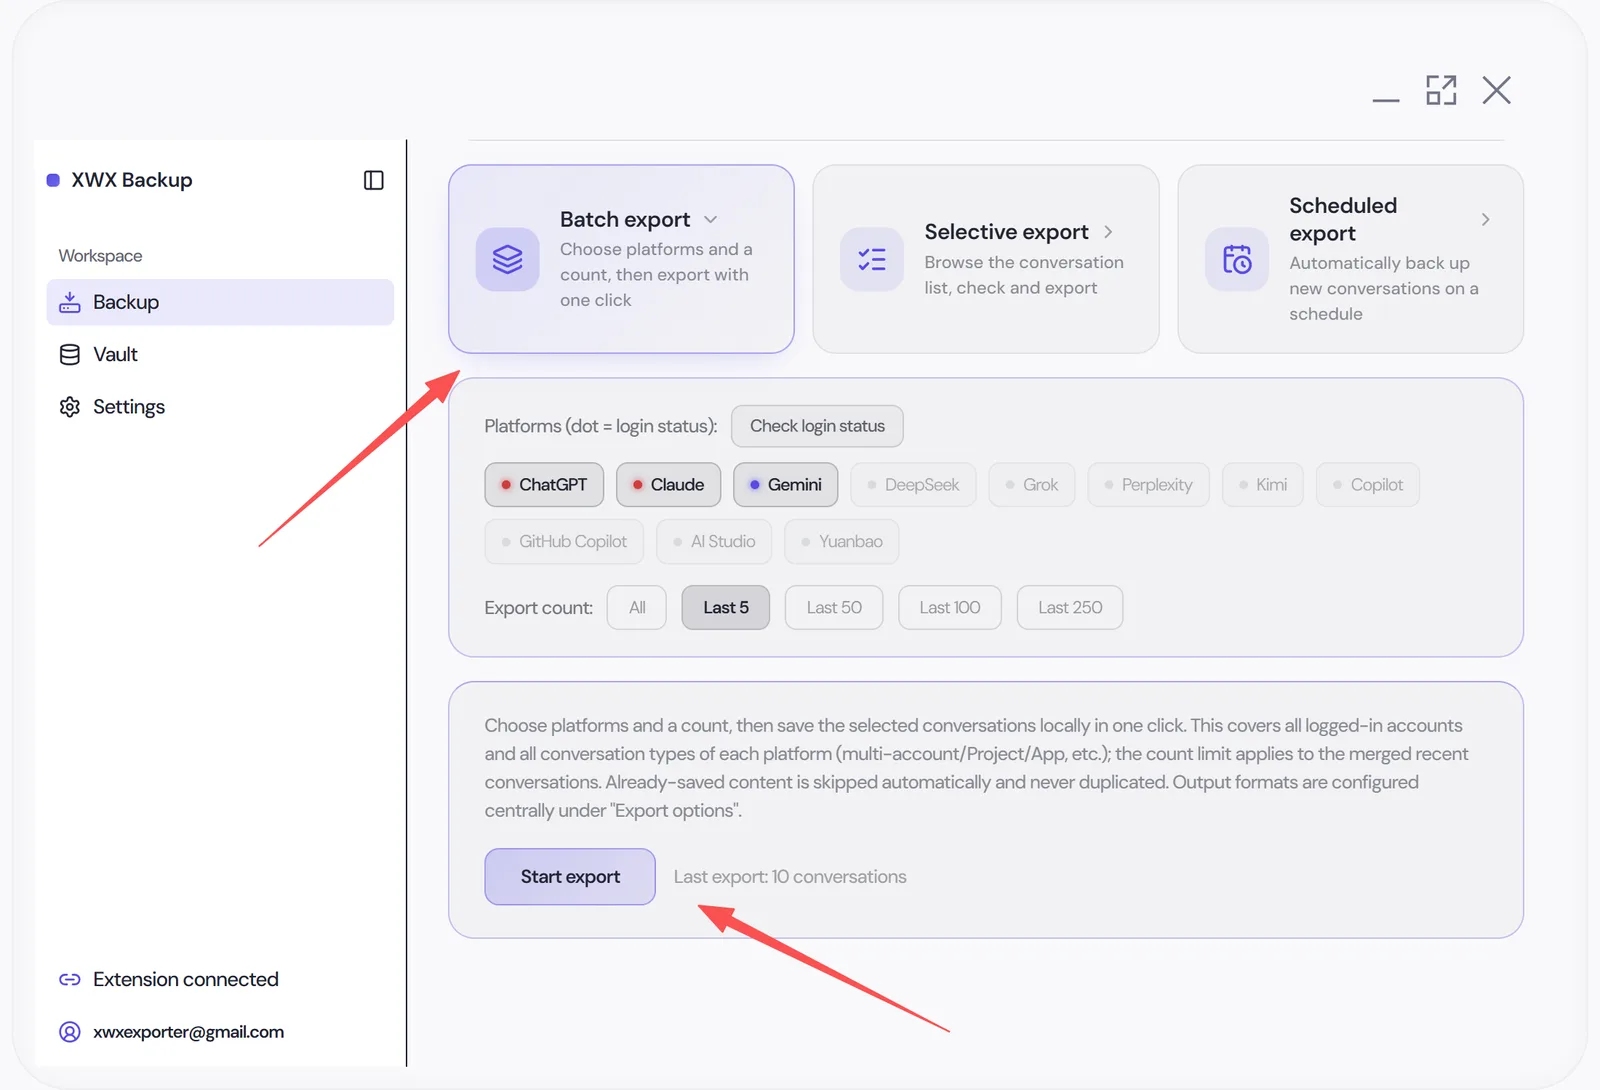
- On the Backup page, choose the platforms you want (a dot next to each platform shows login status)
- Set an export count — e.g. Latest 50 to start
- Click Start export
Progress appears live: how many conversations were added, skipped (already in your vault), or failed. Each conversation is saved as a Markdown file in your vault with YAML frontmatter (id, platform, title, model, timestamps, message count and tags).
Open the Vault page afterwards to browse, read and search everything you’ve archived.
Frequently Asked Questions
Does the app work without the browser extension?+
Partially. The vault, search and Obsidian sync work standalone, but importing conversations from AI platforms requires the extension, because it reads data through your real logged-in browser session.
Where is my data stored?+
In a local data directory (`~/.xwx-backup` by default): the Markdown vault, the search index and settings. You can move the vault location in Settings → Vault at any time.
Can I sign in without a Google account?+
Yes. Google one-click sign-in is the default, but an email verification code works too: enter your email, request the 6-digit code, and type it in. No password is ever set or stored.
Is there a Mac version?+
Currently Windows 10/11 (64-bit) only. macOS and Linux builds are planned.
Can I use the app on more than one computer?+
Yes — your account supports up to 3 personal devices. Manage (unbind) them in Settings → General → Account.